
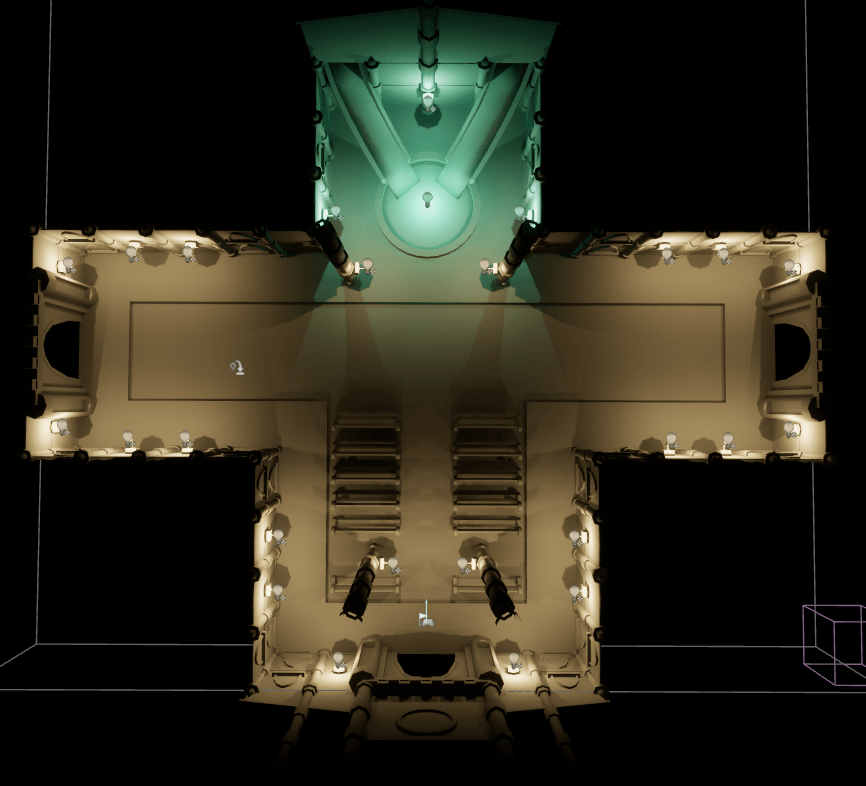
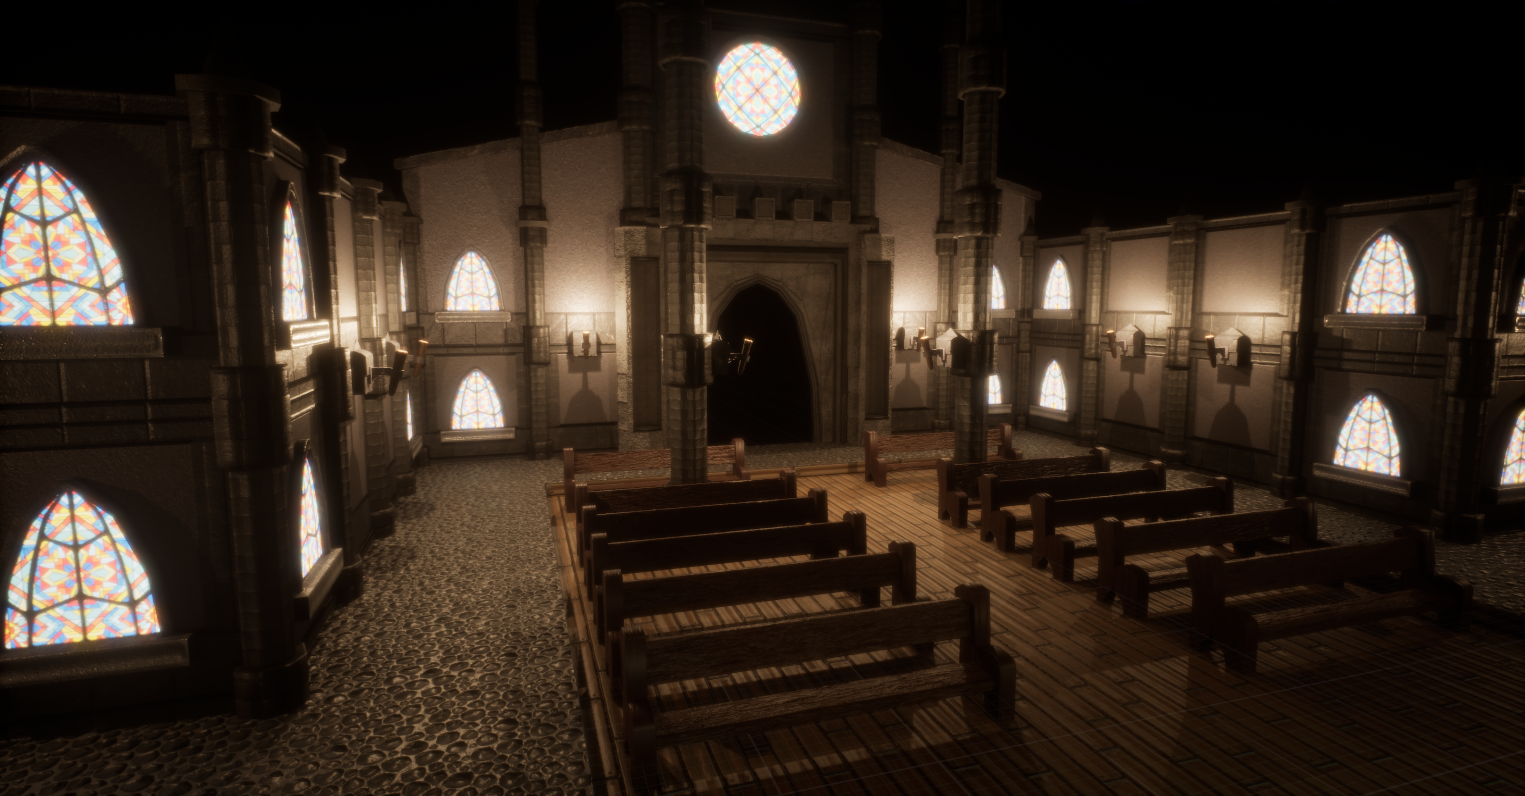
I wanted to create the illusion that you were walking through magnificent halls during the daytime. Despite the daytime setting, due to the scale of this building, its still going to be relatively dark and roomy inside, the only light coming from torches and windows. I decided to remove any directional light from this scene, and stick with a black background. this helps the tops of the walls and pillars fade into the illussion of the roof. Obviously, I cant actually add a roof, as this is a top down game.
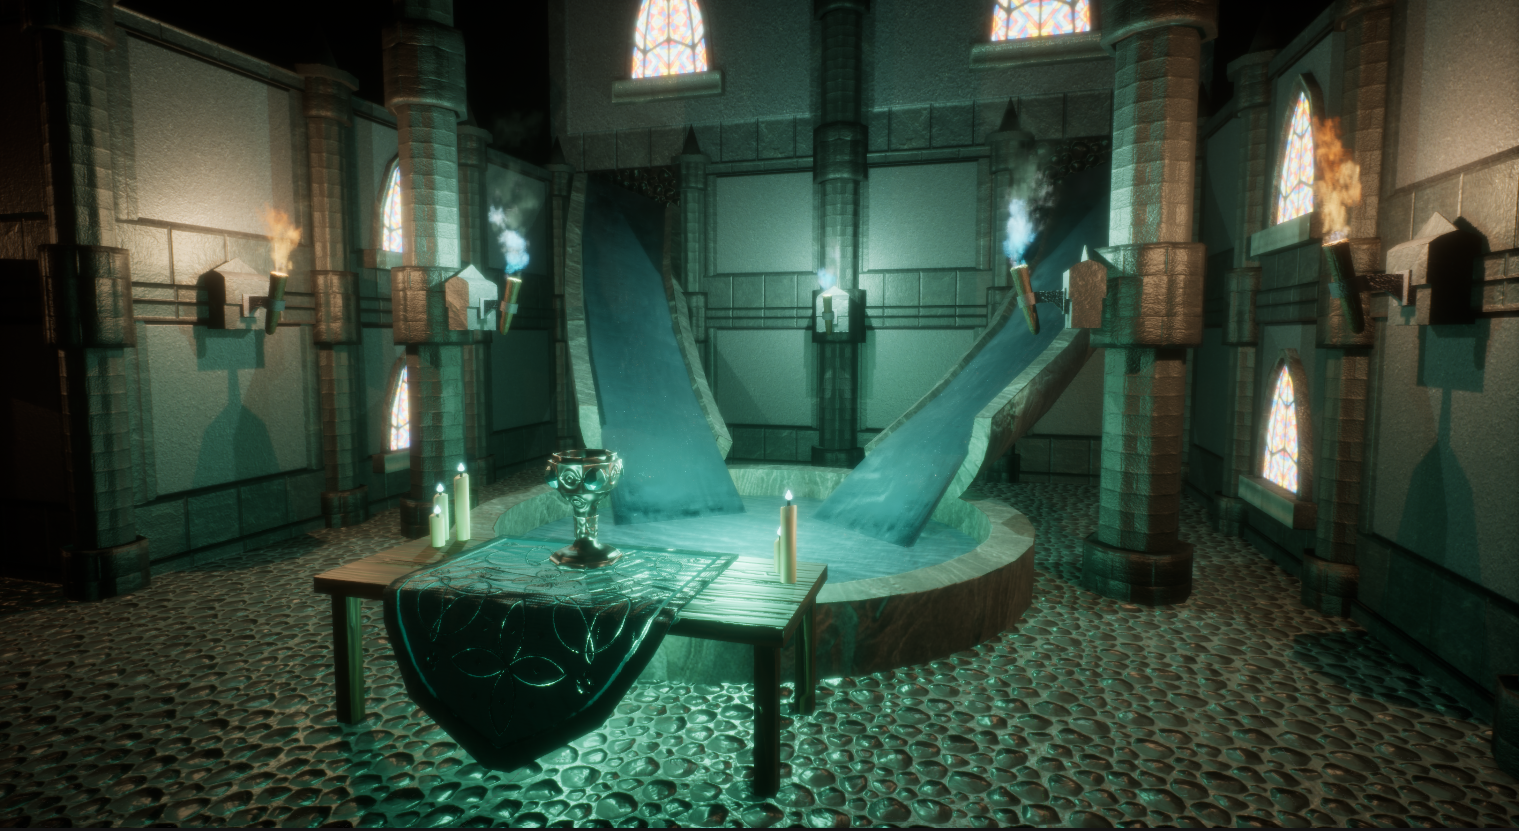
I also decided to add some blue point lights to the fountain area. This will make it stand out more to the player, helping them recognise drinking grail as an interactable hero asset.

I also decided to change the lights that were around the hero asset. Adding some slightly bluer lights, really makes the grail standout more as a special area.
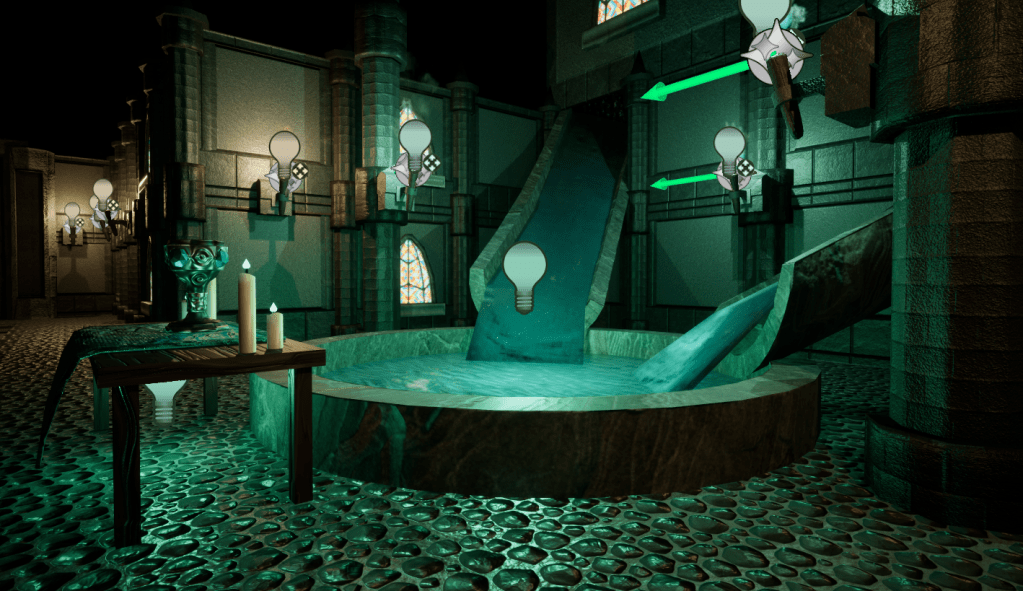
I also found that by disabling shadows on the light in the water and under the table helped create a more balanced stylised glow surrounding the area.
Fire simulation
Motion Dreams. (2023). Fire Simulation FX in Unreal Engine Niagara | in 12 minutes. [Online]. YouTube. Last Updated: January 24. Available at: https://www.youtube.com/watch?v=q8avHL7syC4 [Accessed 7 May 2025].
I found this super awesome tutorial for creating simple fire particle simulations. I used this to add some extra lighting and flare to my torches.
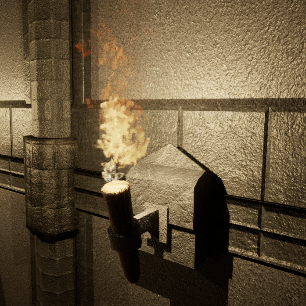
Overall, this looked really good, but still looked like it was missing something.
Post processing
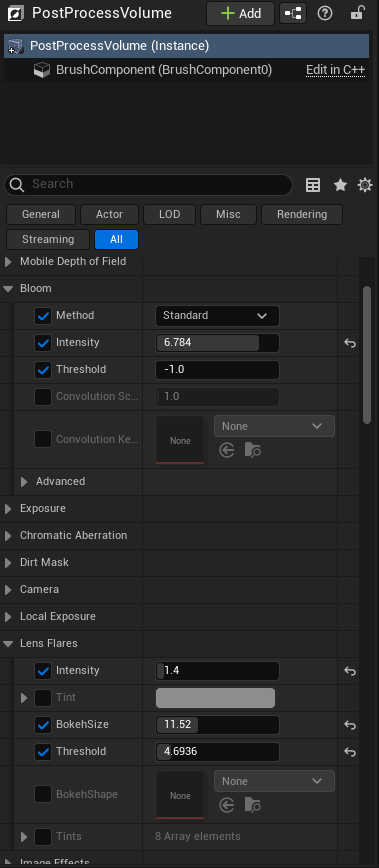
Post processing is the the word used to describe editing the colours/render after all the lighting has been calculated. think of it as the final touch ups to make your lighting pop.
All of this is edited in a post process volume component, and is as simple as check marking boxes and playing with sliders until it looks good. I added some bloom, lens flares, adjusted the exposure and tint to make things look a little brighter and warmer, helping reinforce this area of the map as a starting point, or safe area.


Leave a comment