
The Floofvali is a project I personally have wanted to try for such a long time, but the whole process of making a vrchat avatar base was incredibly daunting. However, as a well established asset maker, and vrchat player myself, I knew the value of avatar bases, and if I wanted to take my online gumroad business to the next level, I would need to get some bases under my name.
In game photos, and showcase
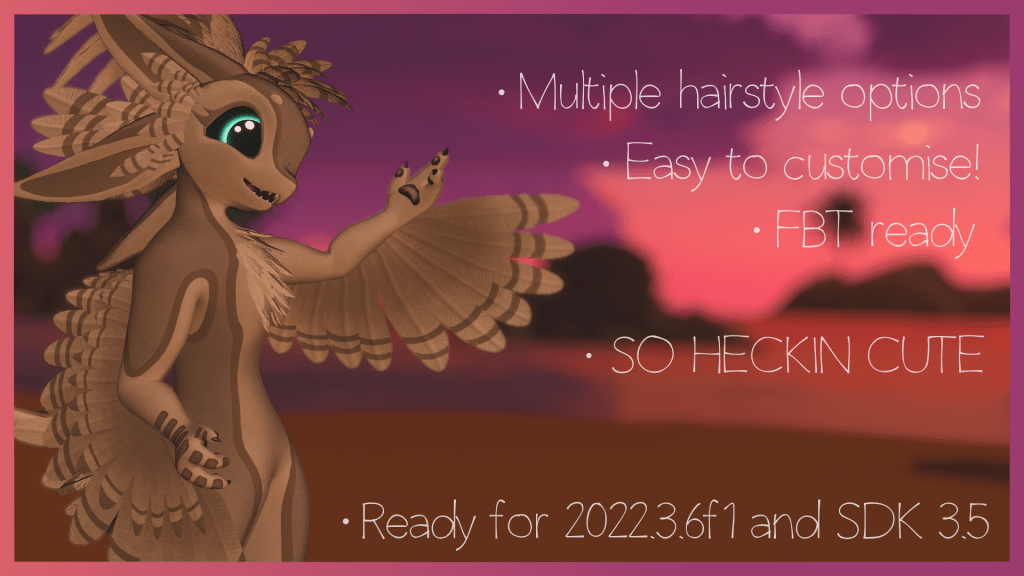


To really emphasize how valuable these things are, here are a few examples of successful bases:

The Rexouium avatar base is a popular Vrchat, and social VR avatar base. It was made by Rezillo Ryker, and is available to purchase of Gumroad for 45usd. Looking at the store page, we can see (at the time of writing this) the avatar base has around 1800 reviews, and around 12,000 active members in a community discord server. From my experience selling on Gumroad, only around 10-15 percent of buyers will actually leave reviews. So although not publicly displayed, we can safely assume that this base has achieved over 10,000 sales, which for its price point, is hundreds of thousands of dollars earnt from this product.
Another popular base is the Nardoragon, and it has a similar success story to the Rexouium. This base comes as either a base version, or an expanded version which includes additional customization such as clothing. This base is a similar to the Rex, in that it has over 1000 reviews, and a discord server with around 7000 active members. We can safely assume that this base has also made tens of thousands of dollars.
Understanding the audience, and what they want from avatar bases.
These mentioned bases, and many others all typically have similar traits, such as being incredibly easy to customize with things such as a range of different shapekeys to change the shape of the body, its features and expressions, easy to use texturing files for multiple programs, such as substance, and 2D painting programs like Krita and Photoshop.
They are also typically well optimized, averaging around 40k – 60k polygons, using only a few separate material slots and skinned mesh renders. At the end of the day, people who buy these bases are using them for social VR games such as Vrchat, animating, or for things such as V tubing. Many of these features are very intensive on computers, and for people using them for VR games, and streaming, performance is very important, so keeping them as low poly as possible is very important.
Most people who are buying bases, do it because avatar creation is difficult. It can take months to create a character from the ground up, and it also takes a lot of knowledge of 3D modelling, texturing and unity, so buying pre set up bases that come with pre made, idiot proof unity packages saves people the hassle of all that learning.
Another great thing that many of these creators like to do with their customers is create large communities! They will regularly host virtual meetups, and encourage creativity with their products. This positive community interaction creates some pretty dedicated fanbases for certain types of avatars, and can be great for keeping consistent sales every time you release new products.
Another thing most base makers like to do is allow the use of their products for monetization! This allows verified customers of the base to commission each other for texture work, make custom model edits, sell clothing assets, produce exclusive content, and some even let you make merchandise using the base.
Idea generation for my own unique model.
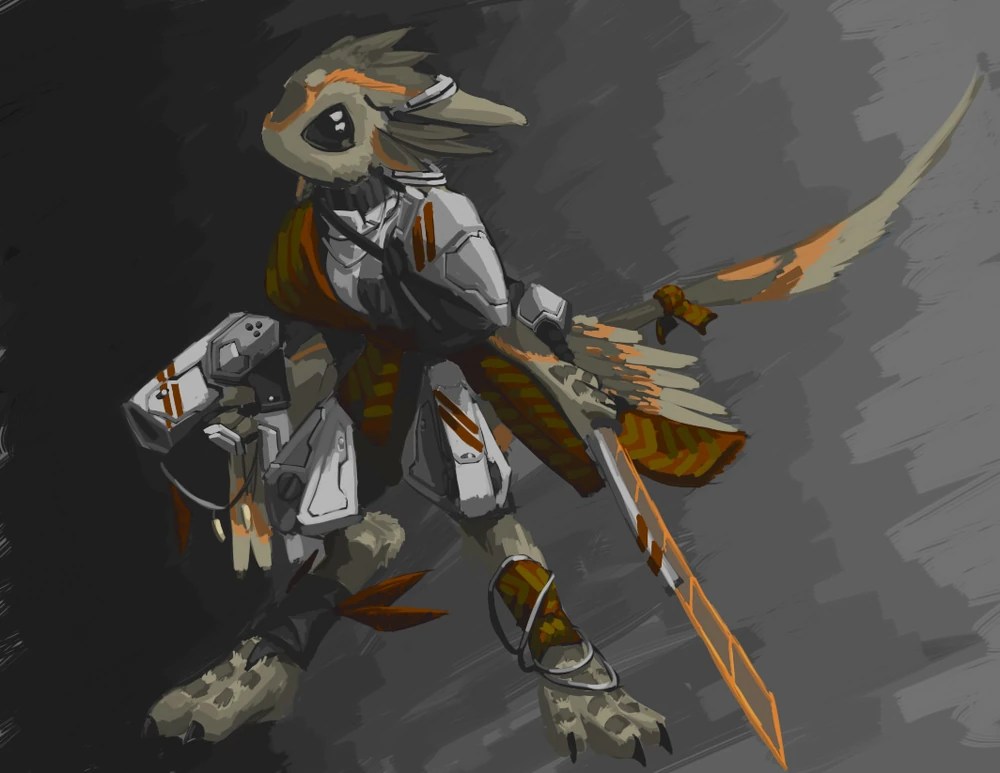
Personally, I have always thought the Avali race (an original species created by RyuujinZERO) is just super cool. I think the official lore and backstory behind them is super interesting, and I already know they would be popular as a base model because popular Avali modes already exist, and have been popular for years! Whilst none of these bases are officially made by RyuujinZERO, the species itself is open, and encourages artists to create their own spin of versions.
You can read more about the official avali lore on the Avali fandom website: https://avali.fandom.com/wiki/The_Official_Avali_Wiki
I decided to collect a couple of reference images from the official avali website, and other artists, and sketch out my own side profile of what the base might look like. The side profiles would help me with the modelling process.

The sketch like images were taken from the official avali website, and were drawn by RyuujinZERO. The screenshot of the topology was a screenshot of Rai kitamatsu’s ‘Kitavali’ which is her original Avali model. I thought that it might be a useful reference for the modelling process, to help figure out the topology.
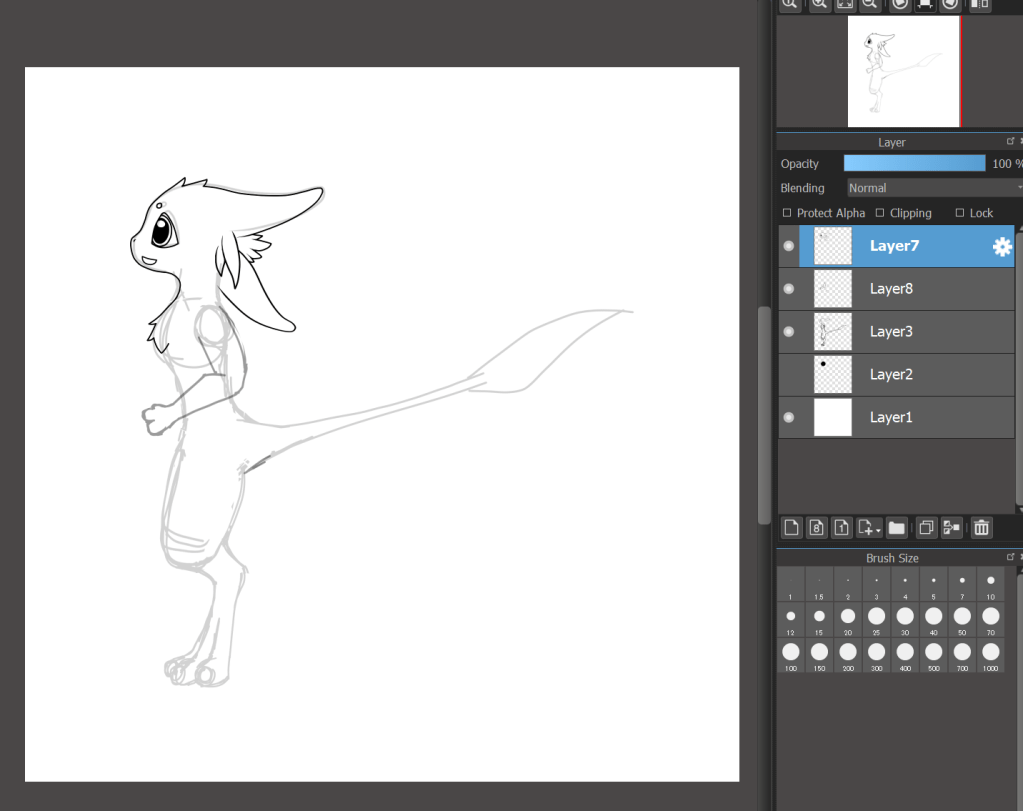
I also sketched up my own side profile in Medibang paint pro. As I mentioned earlier, this will be a useful reference when modelling.
3D modelling.
To model my character, I will be using blender, which is a great piece of software, and is completely free to use. Its very quickly becoming an industry standard piece of software due to how frequently its updated with new features, and is so easy to customize with various plugins available online.
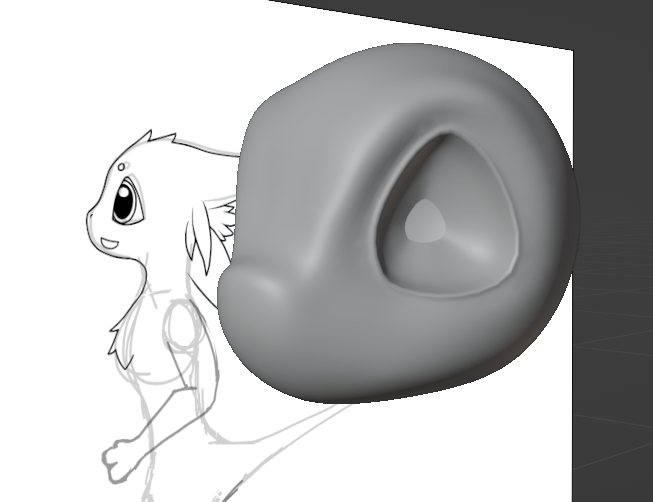
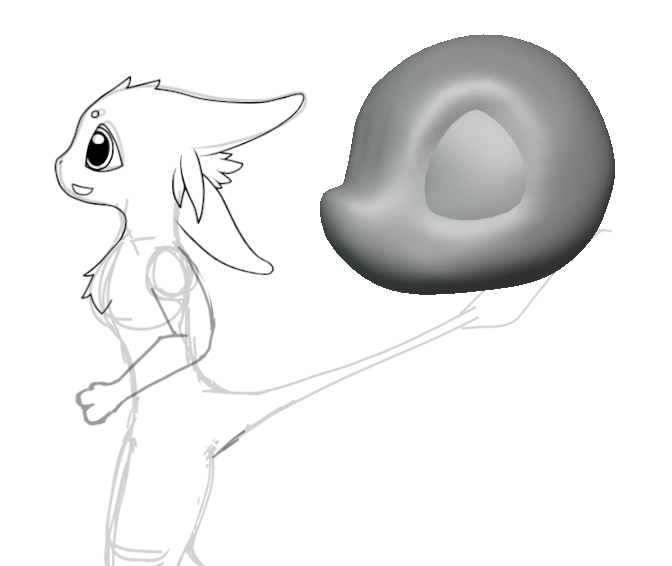
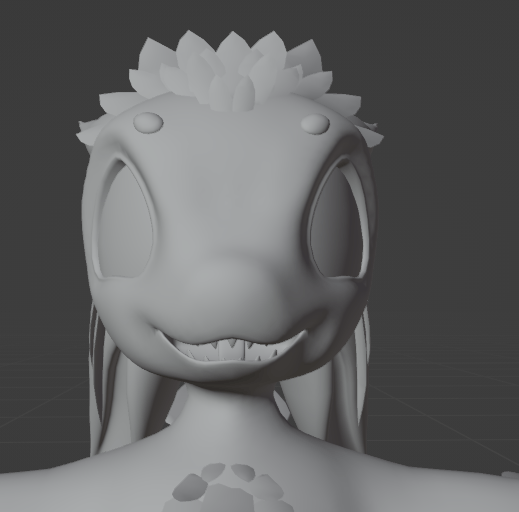
I decided to start off with the head. I started with a cube, and subdivided it a few times, so I could use the sculpt tools within blender to construct the face. I also used the auto mirror plugin to make sure the face was perfectly symmetrical. To make the outlines of the eye bits a bit more defined, I used the extrude, and the scale tool in the edit mode to make them kind of bump a little bit. The eyes will be a separate mesh, as they will need to rotate around for eye movement.

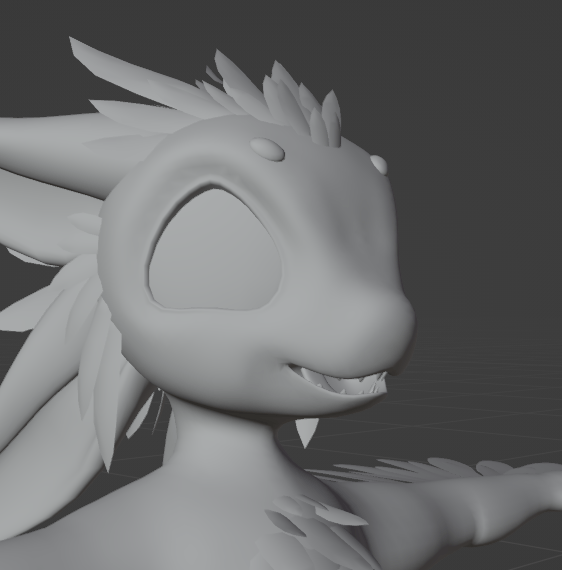
For the ears, I used a similar modelling technique, and duplicated them to create the avails 4 ears. The mouth was created by separating the mesh at the general area, smoothing it out, and extruding it inwards. I would need to model the entire inside of the mouth, for the visemes.

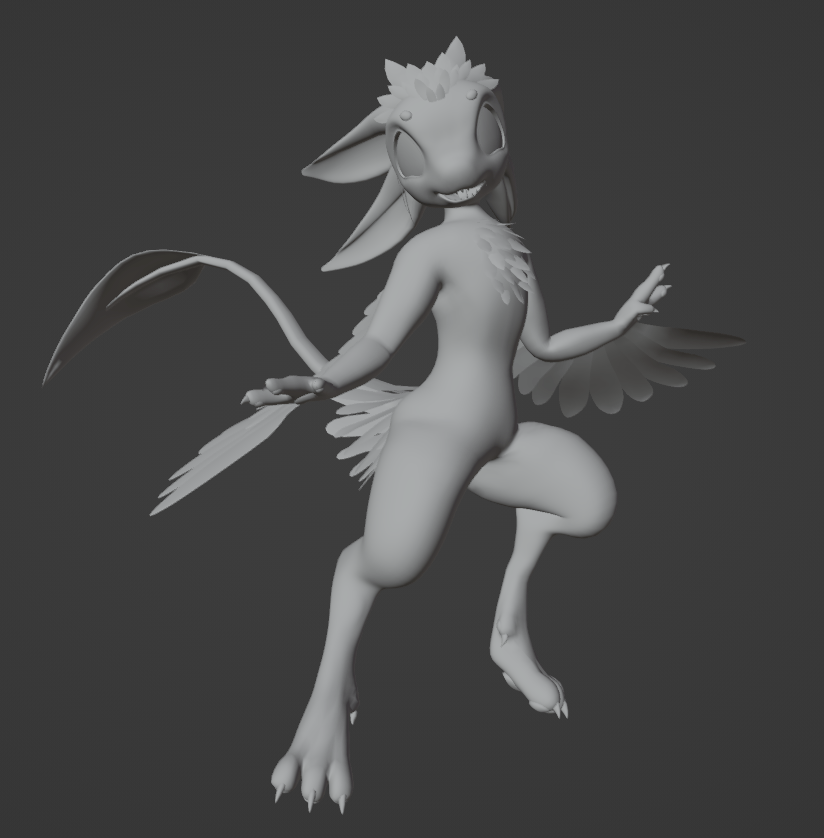
It was a similar story for the body, in that I started with a subdivided a cube and sculpted it to shape, however for the lower body, and the legs, I found it easier to make the rough shape simply by extruding the edges. This also allowed me to create some fairly neat and consistent topology. I smoothed out the whole thing and touched it up with the sculpt tool after roughly modelling it.

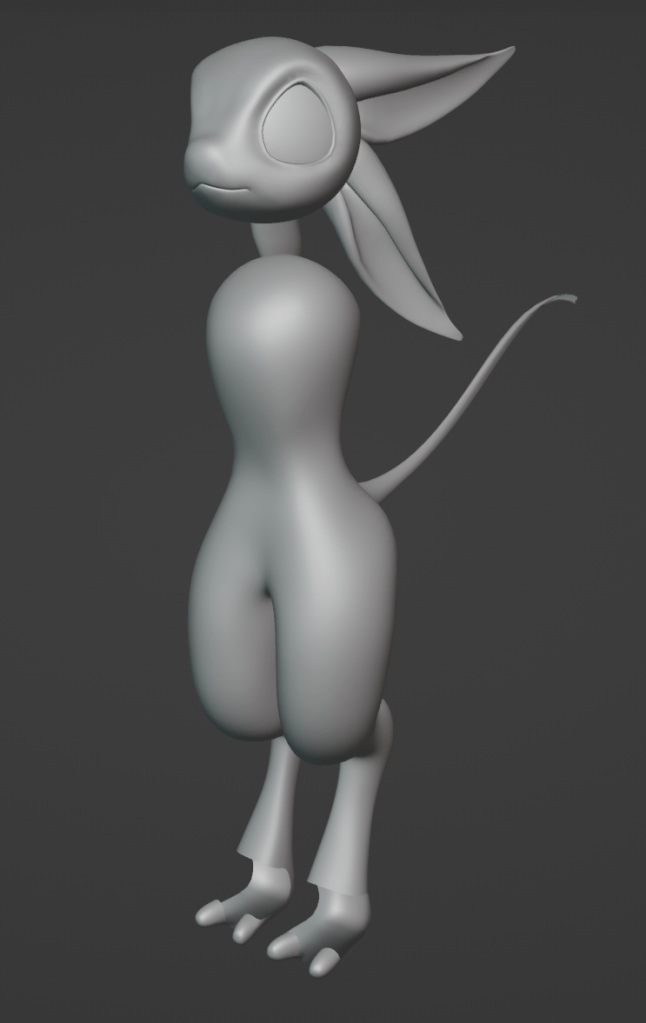
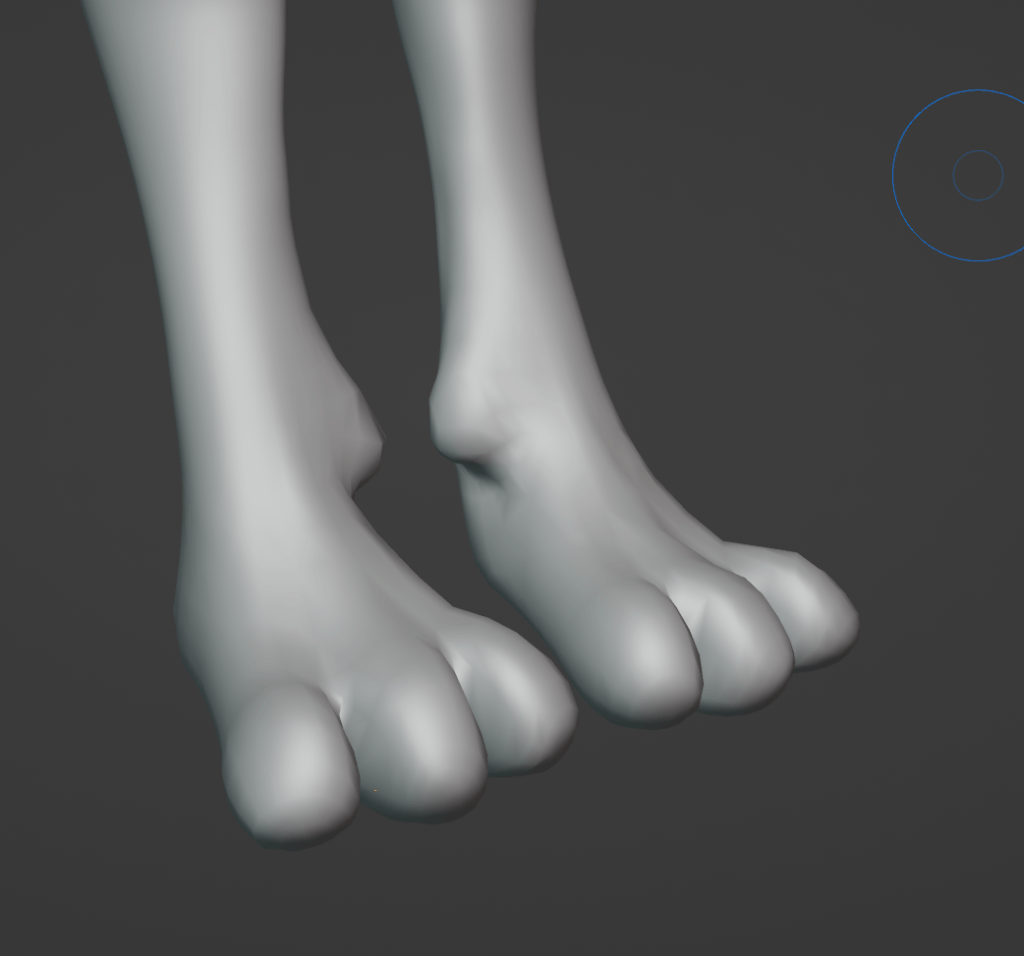
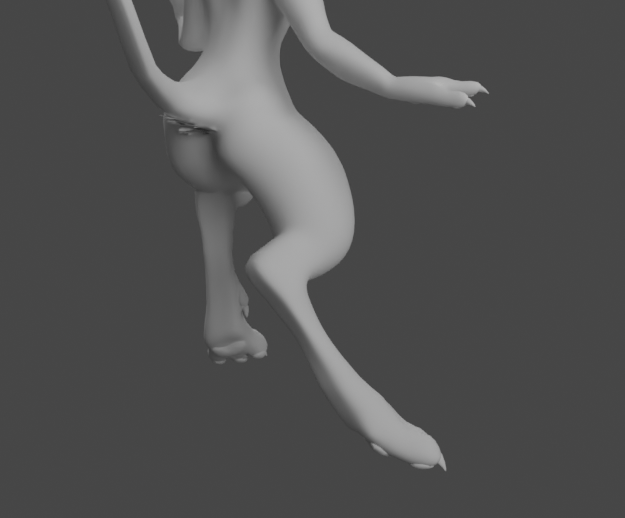
I was making sure to keep the legs close to a digitigrade style during modelling. This is a name given to a more animal that runs and walks purely on its toes, the rest of its foot kind of extending upwards. Avalis have very raptor like, enhanced digitigrade style legs, so I tried to keep this accurate.
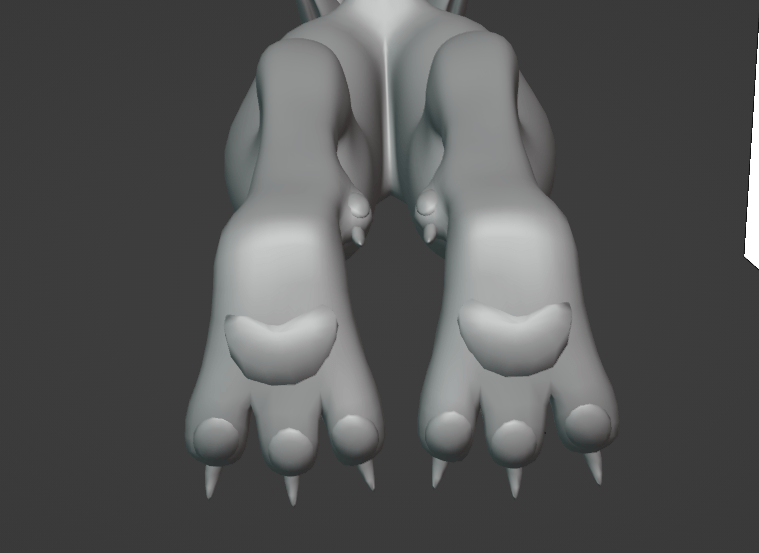
I sculpted a bump on the inside of the feet, this would become the Dewclaw. I also created some pretty rough paw pads and claws, which I hit pretty hard with the decimation modifier. This wouldnt be a problem, as these parts wont be rigged, and are going to be pretty stationary, so I wouldn’t need to worry about it deforming poorly
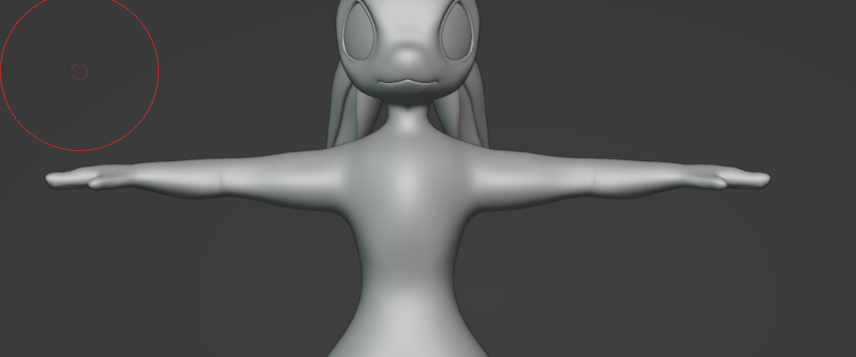
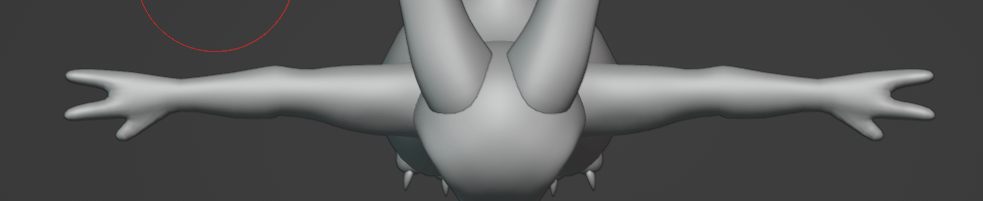
Modelling the arms was a similar process to making the legs and feet, by which I extruded them loop by loop roughly, and touched up on the shape with sculpting tools.
For the hairstyle and main feathers, I went through quite a lot of different options. I wanted to have a couple of different interchangeable options, which were lore accurate to the avali species. This makes my base a bit more unique compared to others, as many bases come with just one set hairstyle, which cant be customized at all.
This is a reference I used of different canon hairstyles drawn by RyuujinZERO:
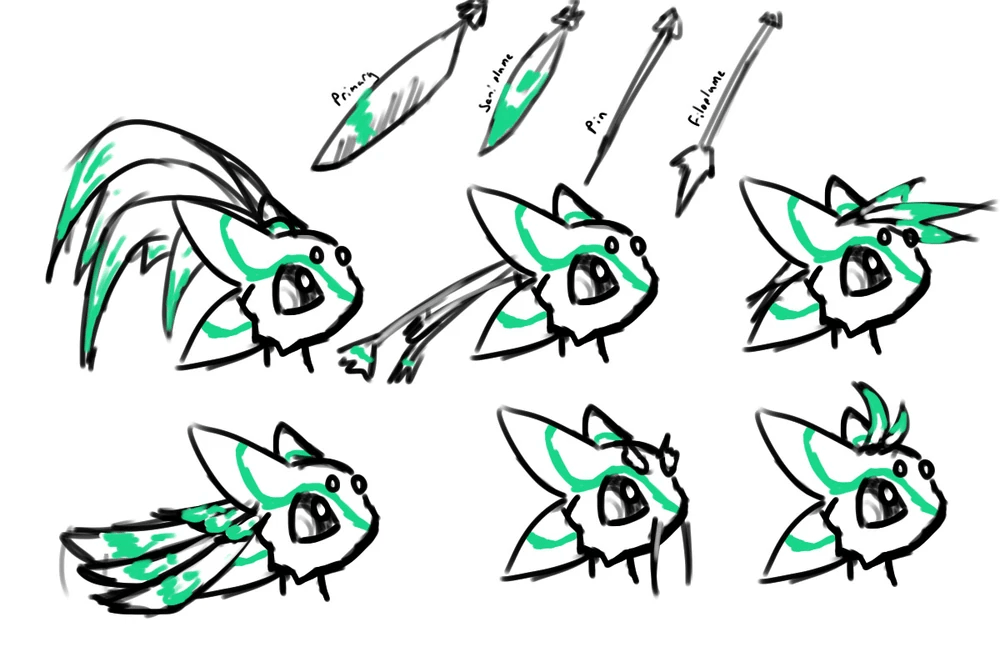
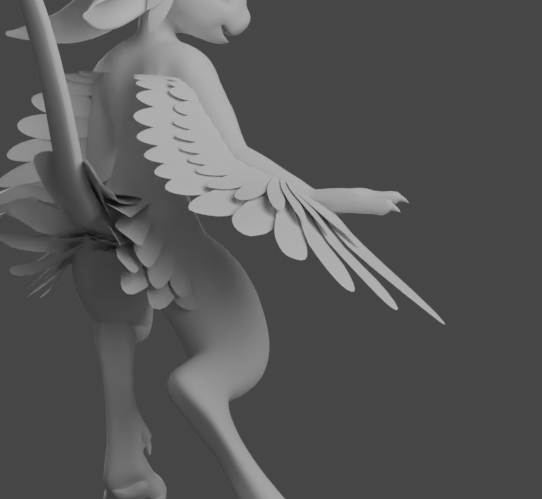
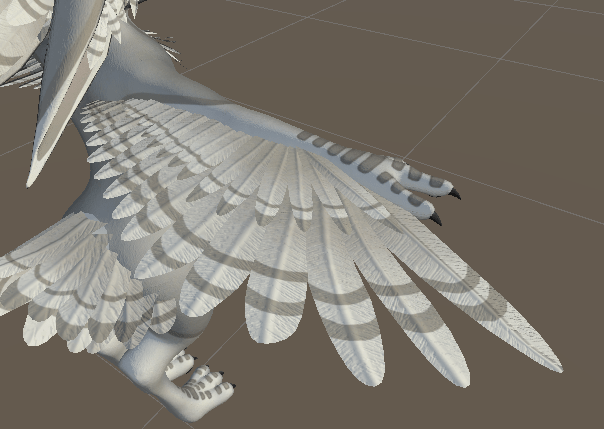
Before I started designing all the fancy hairstyle options, I first needed to just do the basics, which included doing the lower body tail feathers, all the wing feathers, and some basic fluff around the chest area, head and butt.
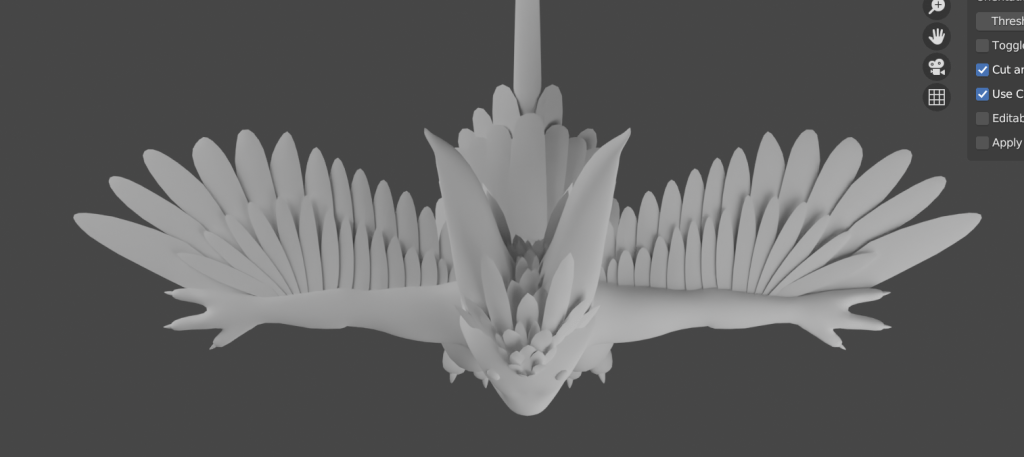
The basic feathers were looking super good in my opinion. I also used the solidify modifier to make sure the mesh was double sided on the underside of the feathers. This is very important, as when you port 3D models to oculus headsets, the Android operating system doesn’t allow shaders which support backface culling.
Live feedback.
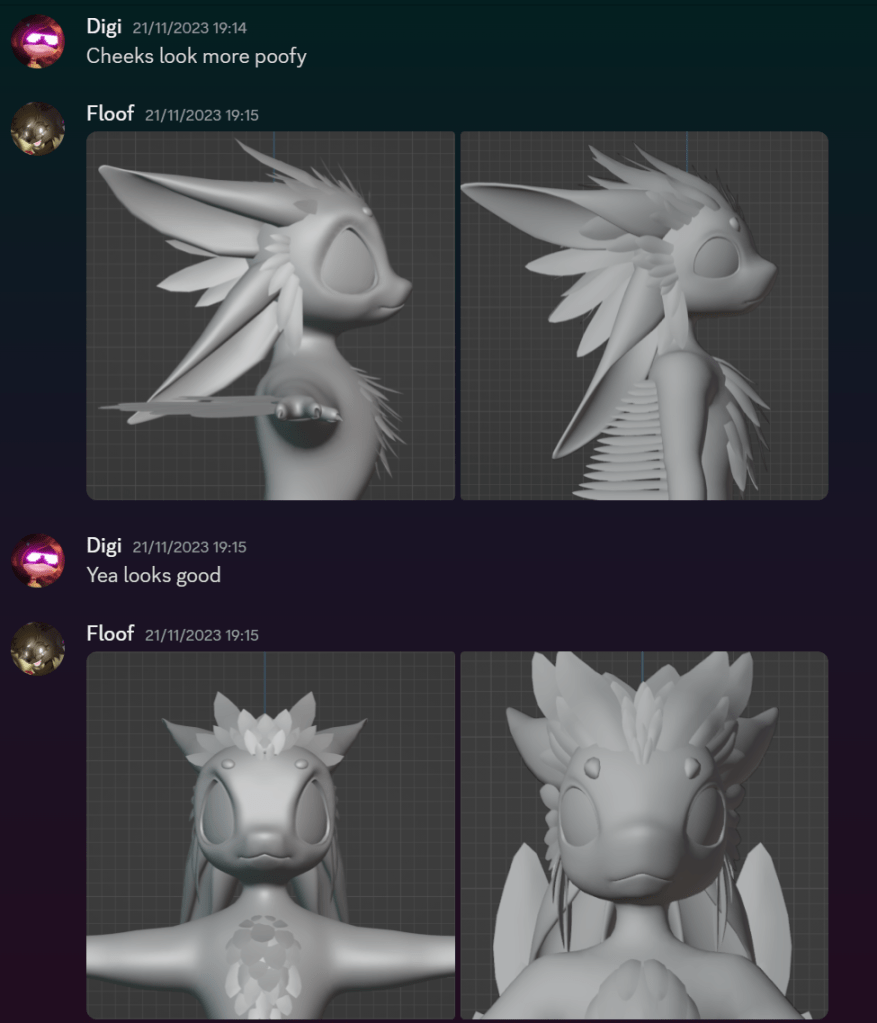
Throughout my entire creation process, I was uploading WIP photos to channels within my own discord server, and a few other notable avatar creator servers, such as the Avali army server, and the Kita’vali server. I did this for multiple reasons. It allowed people to critique my work and help me have direct communication with what my audience would want to see from my avatar base. It also allowed to to generate hype and excitement for the base, which is always good for release day sales ect.
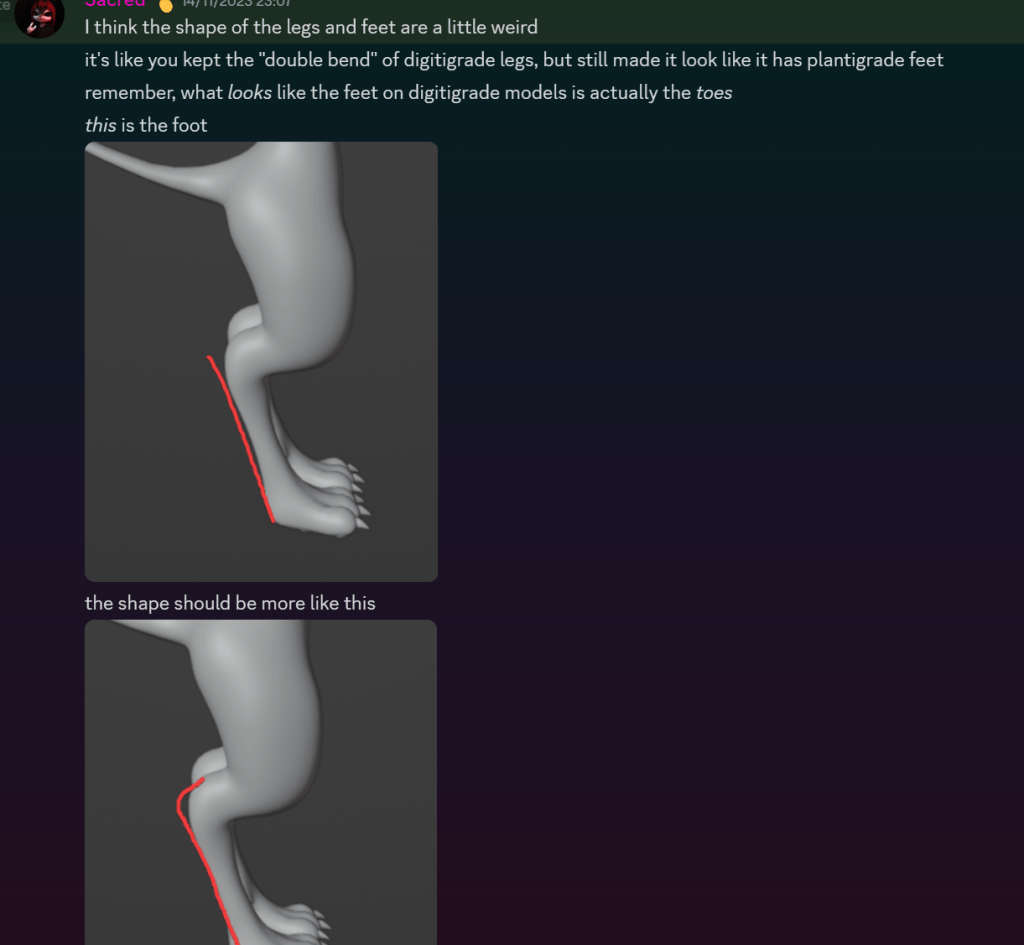

Whilst lots of the advice wasn’t super helpful, after filtering through some hate and useless comments, I did get some actual interesting information on what people thought about the current state of the digitigrade legs, and how I could improve the shape. I also got some other thoughts about the current state of the hairstyles and feathers, and how they were very similar to an already existing model called the Da’vali. I did take note of the headfeather similarities, and decided to change them later down the line, as at the end of the day I wanted to create a unique and original product.
I also discussed the state of the face and headfeathers with my target audience, and some friends, and we did conclude that a lot of people were mistaking my WIP photos for another base, so I did needed to change it up a little bit, otherwise people would have no incentive to buy my base.
the main things I wanted to change were the hairstyle, as it was just too similar. Everything else I believed was new and unique, and very visually different to the Da’vali base.
Here are some side by side comparisons:
Texturing, details, shapekeys, facial expressions, rigging and a mouth… bag?
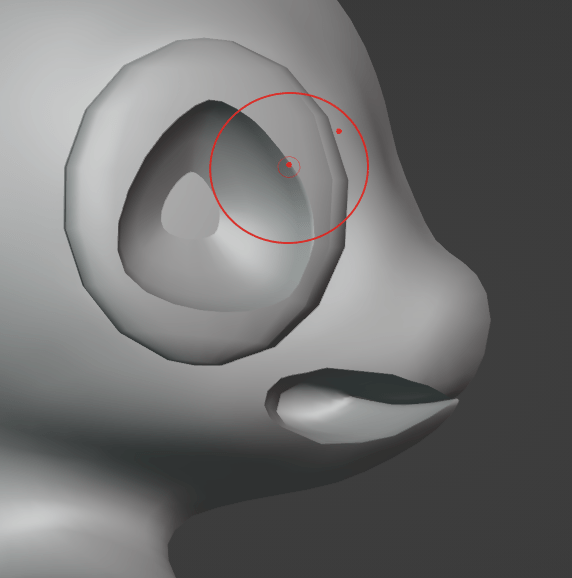
Now the majority of the basic modelling is finished, and has been tweaked to what my target audience want, its time to move onto the details. The first thing that I need to do before working on any facial expressions is finish all the teeth and insides of the mouth.
I used the auto mirror modifier to make things easier to see, and to help with visibility, as I found this stuff pretty finicky to model. First of all I modelled a weird looking bag thing, which my discord community promptly called a ‘Mouth bag’. from this picture you can see inside the head, which has been cut in half due to the mirror modifier.

For the teeth, I modelled the shapes using subsidivsion surface modifiers to get a smooth shape. Due to the fact this mesh wouldn’t be deforming like the rest of the avatar, its topology is not very important, so I decimated it pretty hard, and deleted the ends we wouldn’t be able to see, to save poly count.
Now the mouth has been modelled, I had to do viseme shapekeys, all of the facial expressions, and additional customization for the avatar base. VRchat uses the oculus viseme index, so I used the pictures on the official oculus website as a reference, and copied the shapekey names off another pre made vrchat avatar to get the naming correct. This will make the mouth move correctly when you are speaking within vr and streaming applications, without the need for lip tracking.

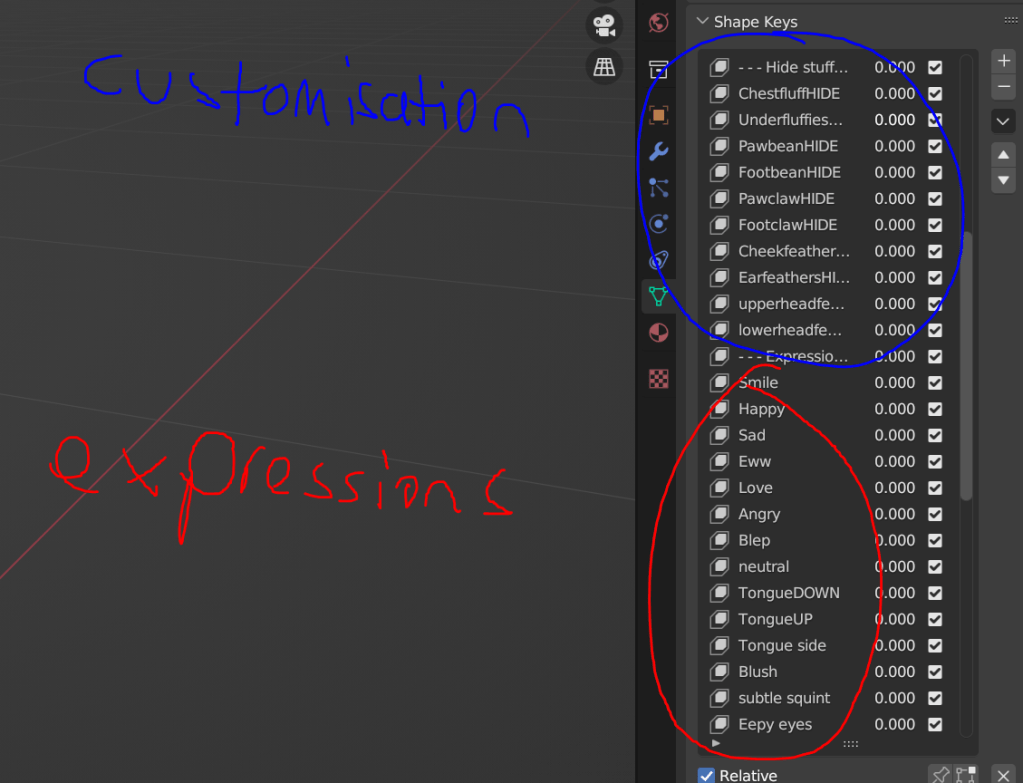
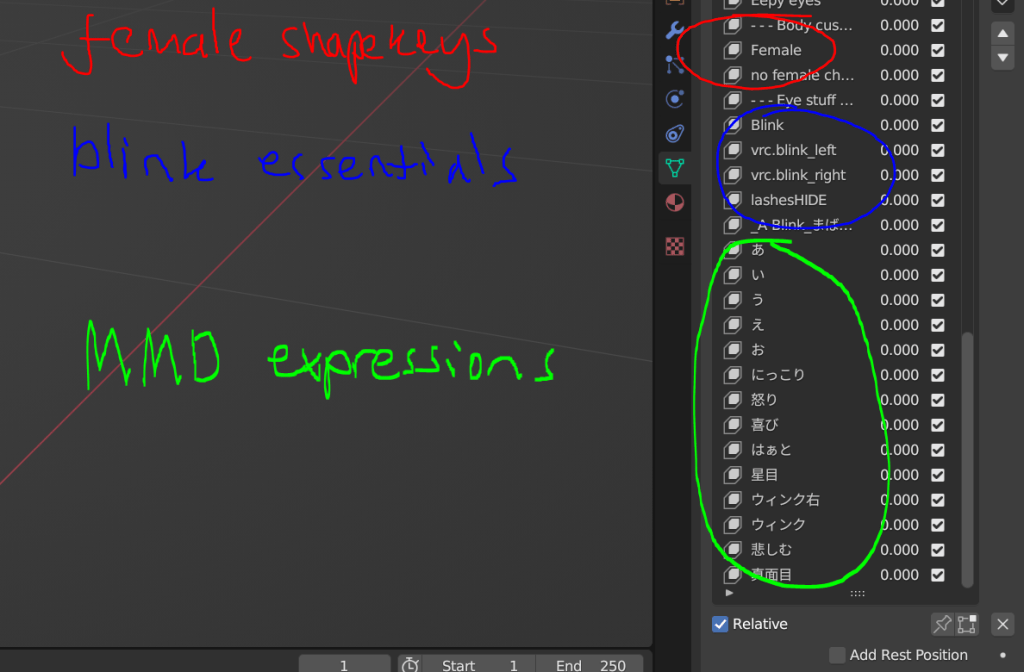
When it comes to customization, I added lots of different options. Most of the customization lets you hide specific groups of feathers, this is good for if you want to put certain types of clothing on, such as skintight clothing, or helmets ect. I also added some ‘Female’ shapekeys. Whist these are not lore accurate, I wanted to cater my base to fans of the avali lore, and a wider audience as well. Lots of the playerbase prefers to have a more female body when in VR, or using streaming software, this may be to more accurately display their gender or sex, or it can be a way of projecting peoples identities in ways the real world cannot. They change the size of the hips, and make the chest appear more breast like.
The expression shape keys are pretty self explanatory, however some might not know what the MMD shapekeys are for, and may be confused looking at all the Japanese symbols. Essentially, they do the same thing as the oculus visemes, but are instead for the miku miku dance viseme index.
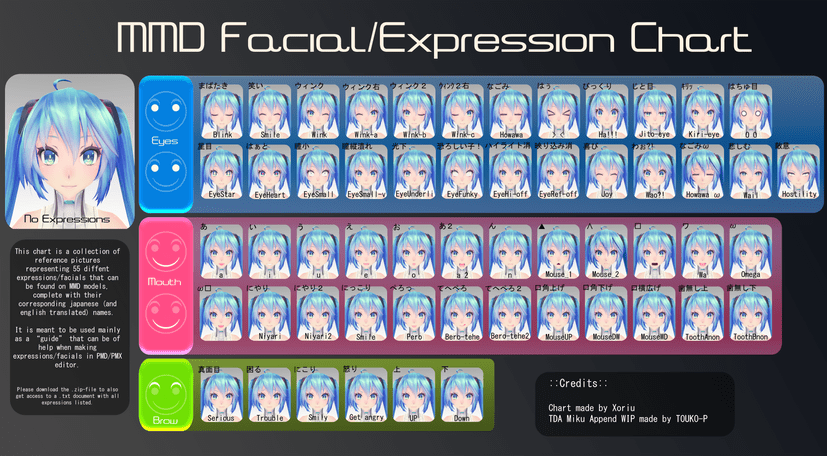
These are often used in Dance vrchat worlds, and obviously for Miku miku dance itself, which is a piece of Japanese animation software. It was a suggestion from my discord community to add MMD shapekeys, as it is a super popular feature for avatar bases. I think the most useful tip I learnt from this was how you can copy and paste values from other shapekeys onto new ones, and even onto specific selected bits of mesh, which saved me a ton of time when I was doing all the multiple blinking shape keys
here are some examples of the shape keys and customization options in action:


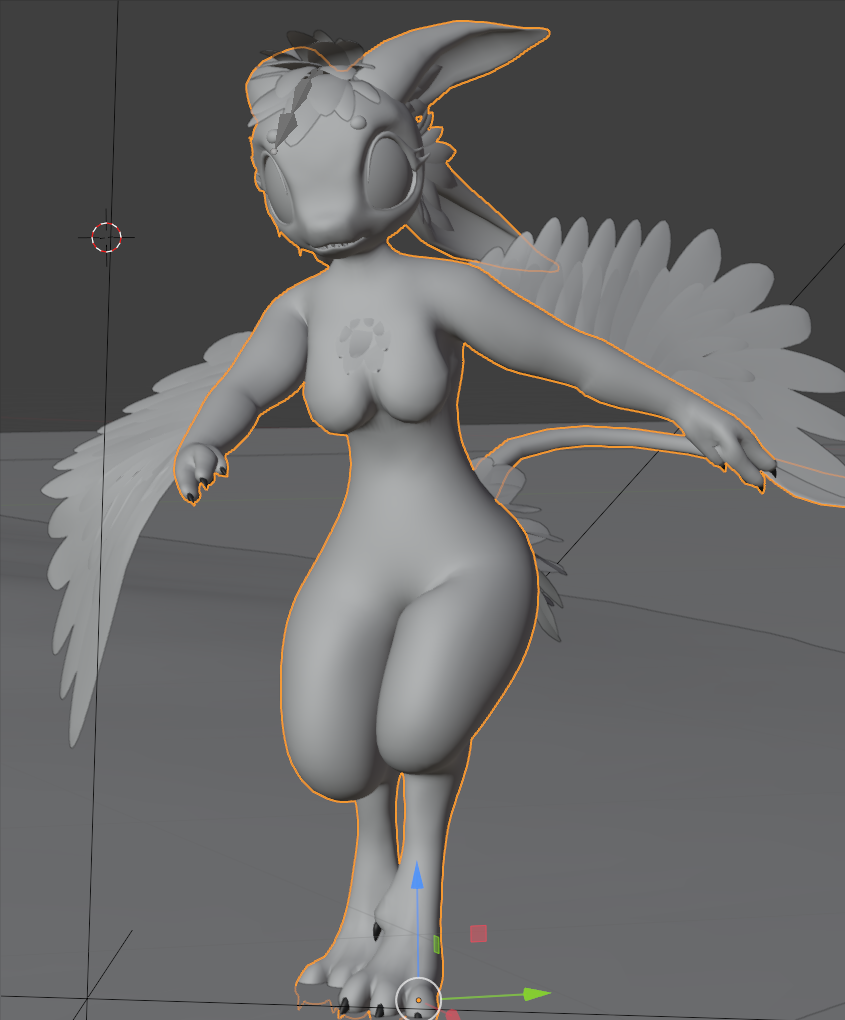
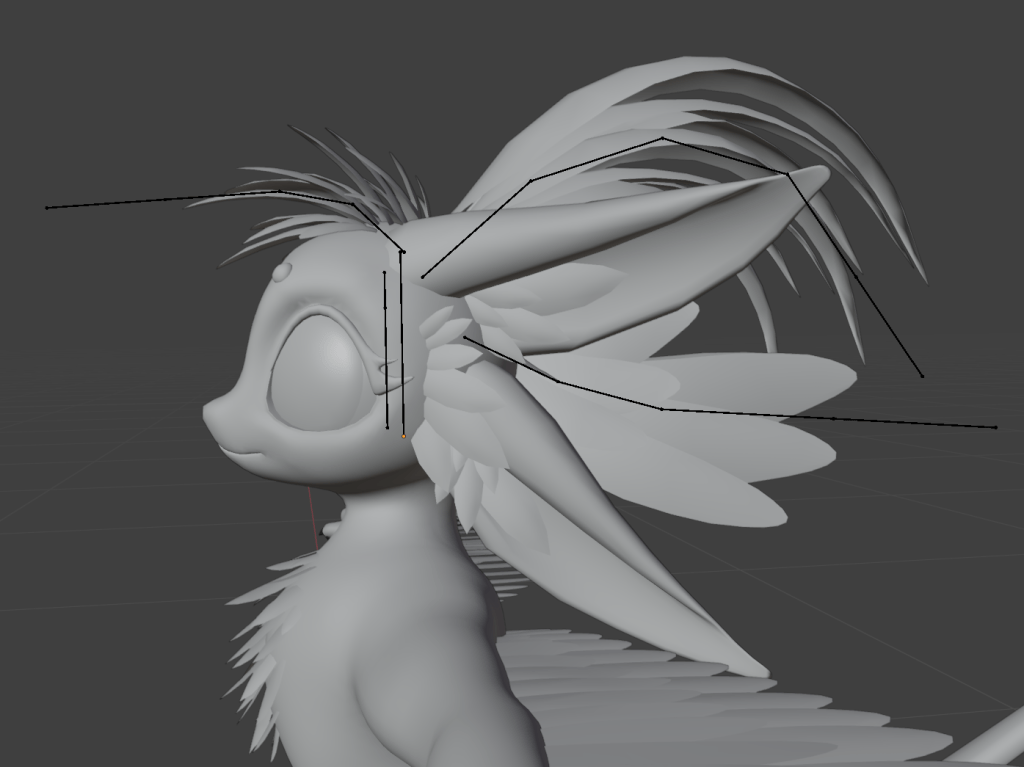
Next came the rigging, which was defiantly a daunting thing to think about, especially with all those bits of wing mesh. To make sure all the wing mesh was going to be weighted perfectly modifiers such as the solidify modifier, which stopped backface culling issues, still had not been applied. This was just to make sure it was all perfect and didn’t have inconsistencies with the top and bottom layer of feathers.
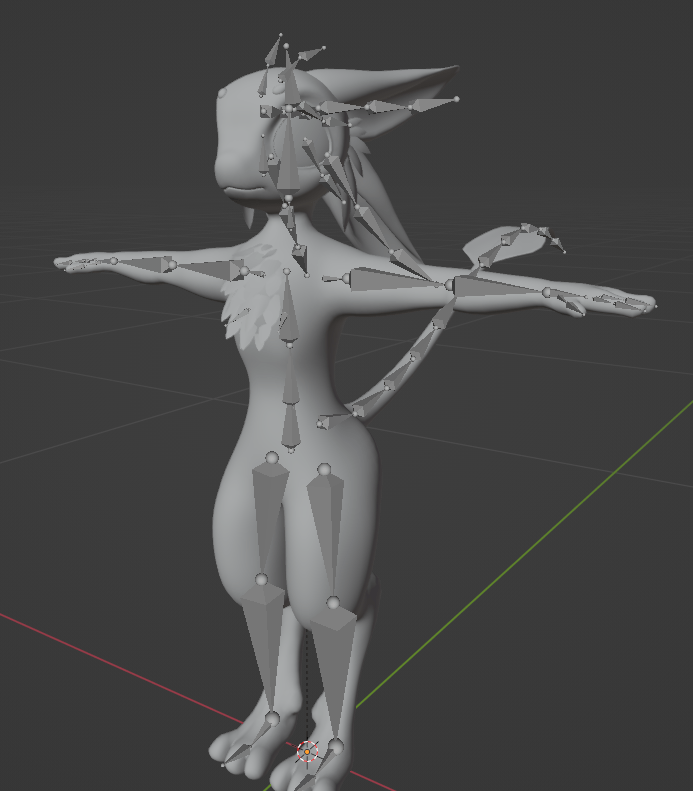
I tried to keep the rig standard, and used the R. and L. bone naming to make sure they mirrored correctly. I also made sure to turn enable auto normalize in the weight painting settings, this caused me lots of issues with the feather weight painting, not knowing that this setting is disabled by default. I also straightened out the the upper leg bones, so that they were perpendicular, unlike in this image provided, as it was causing issues with rotations in the final virtual reality project.
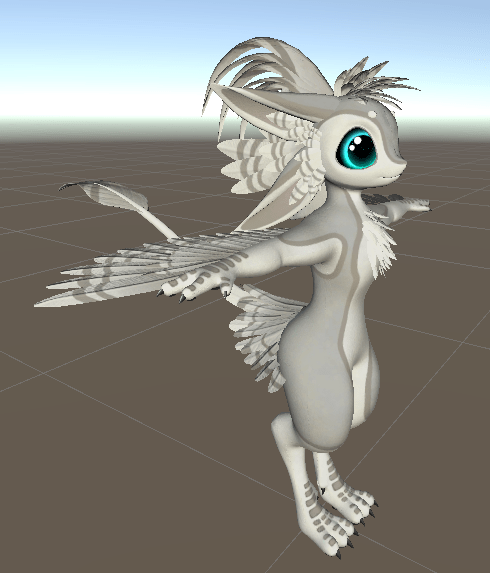
Here was the first posing test I ever did:
Me and my discord community were super happy with how the rig turned out, especially the digitigrade legs and how smooth the wings were deforming.
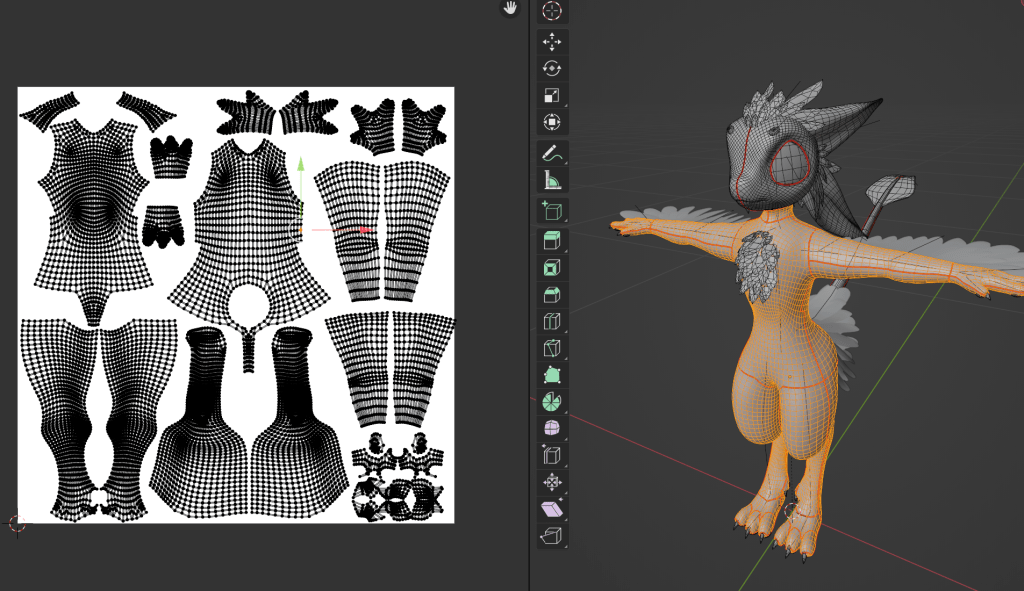
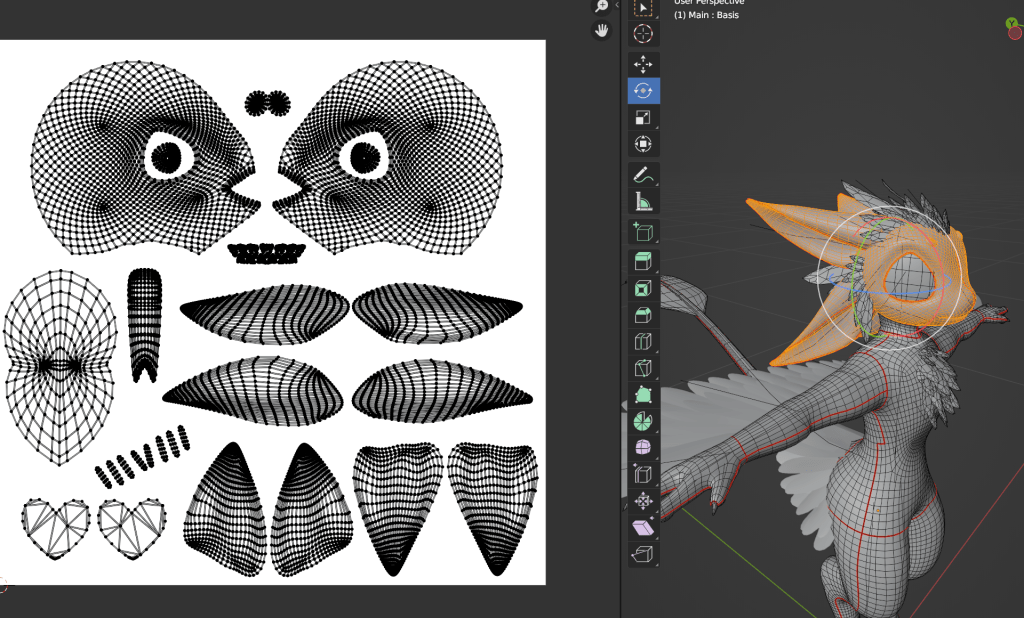
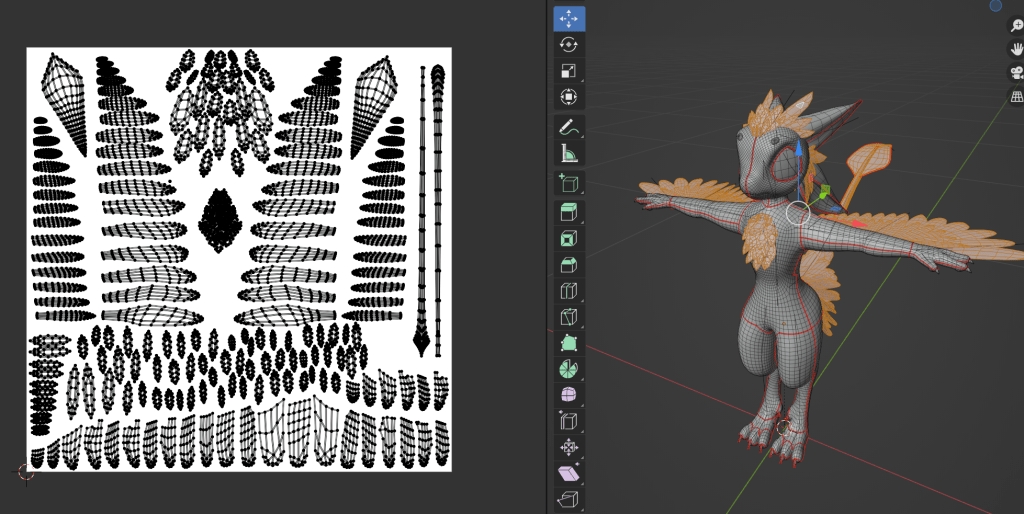
Part of my job as a base maker, is to make the finished files as easy to use, and idiot proof as possible. Not everyone who plays vrchat, who streams, uses social VR is a genius with 3D software, so it is my job to make it as simple as possible for beginners, and people who just want to colour in their own characters. Because of this, I need to UV unwrap the model in a neat and organized way. This will make texturing, especially for those who are using 2D texture files, super streamlined and easy. from these screenshots you can see each material, and its selected areas on the 3D mesh side by side.
I was able to UV unwrap in this sort of style by using seams. They allow you to mark out areas of the mesh and unwrap all in bite sized parts.
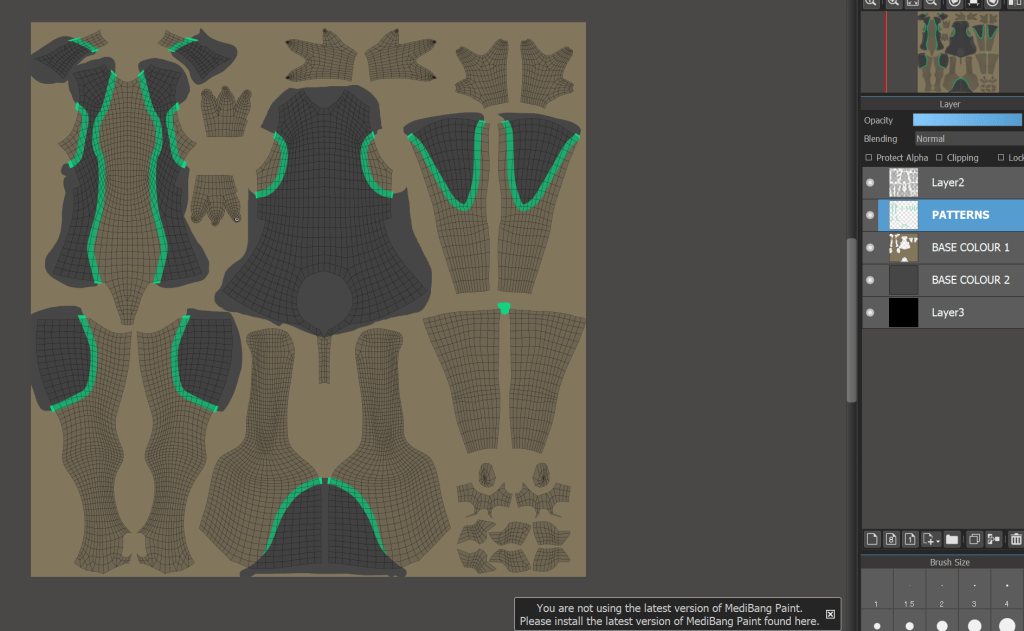
This proved to work out super nicely, as creating the textures was a very simple process, and I think turned out super well. To prove to myself how streamlined the 2D painting files were, I made some additional textures, which were supposed to represent lore accurate female avali colours.
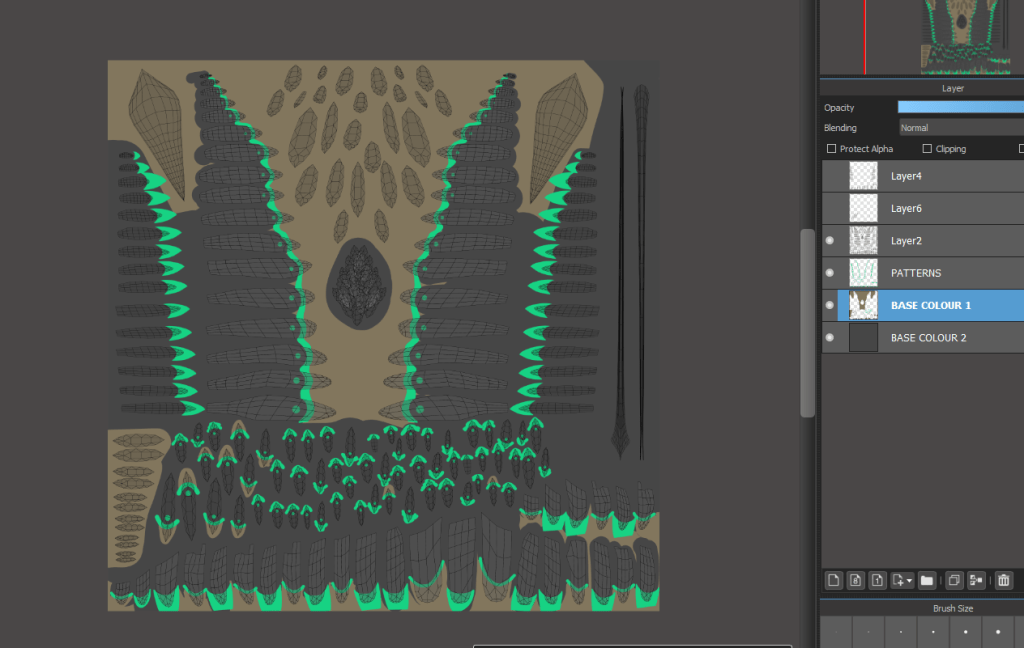

finished lore accurate female colours (lower)
Due to the fact I have little to no experience in substance painter, and didnt feel like sculpting every single feather indent to bake normals, I decided to commission EldritchElias on discord to paint some feather normal maps for me.
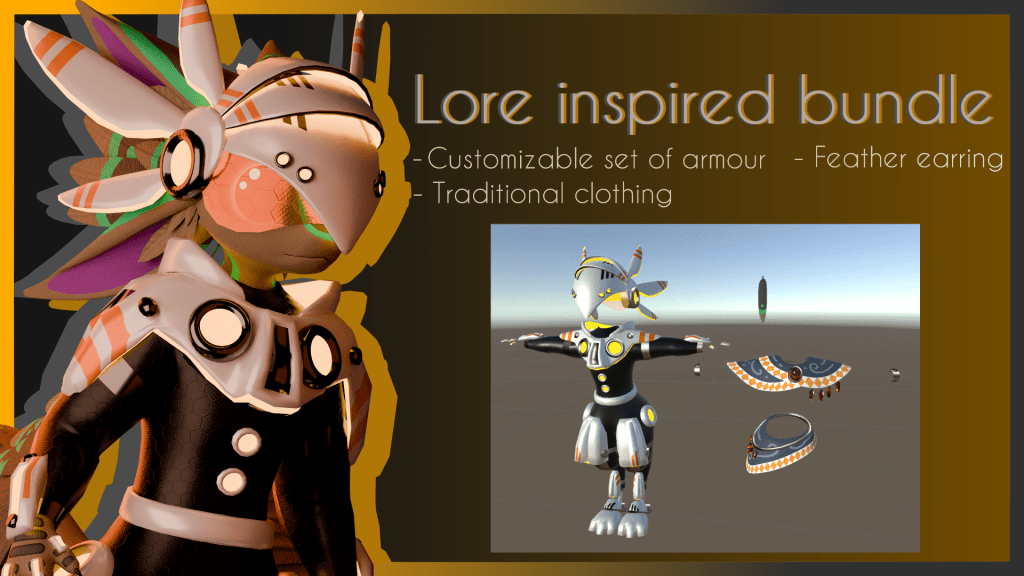
Whilst he was painting these normal maps for me, I decided to focus on the hairstyle options from earlier, and start working on additional content. After consulting with my discord community about clothing toggles, props and other things people would like to see on release, I put together a list of some different launch start bundles. This would help allow avatar creators to get some props on release day instead of having
these were the 3 main hair components that I made to replace the old feathers, as they looked too similar to the Da’vali model. As they are three separate parts, each individually rigged, you are able to mix and match which parts you want to use, or use your own unique model.
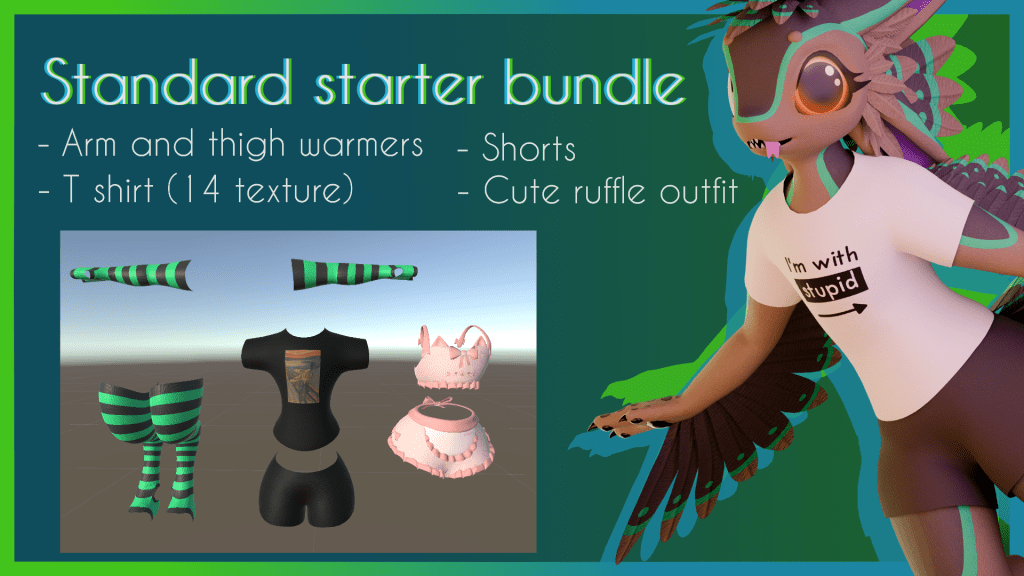
For the clothing assets that came in the starter bundles, I dont want to waste tons of time writing about each and every one, as its kind of more of just the same stuff. As a frequent Vrchat player myself, I know the kinds of people who play this game, and the different vibes of clothing people like to use on their own personal projects, and as someone who is pretty familiar with creating custom bits of clothing and outfits for existing models, it comes fairly naturally. You can see all the different bundles I put together in these storefront pictures:

For the final part of the products creation process, I needed to create pre set up unity projects. This is important, because as I mentioned before, lots of people who buy pre set up bases are not the most savy with 3D and game engine software, lots of customers will be total beginners. So the importance of having a tidy, and easy to use unity project pre set up for them is very important.
I used the official Vrchat avatar documentation to help me put everything together from scratch, and organized the finished files in a way that separated FBX files and other things you don’t need to worry about during the creation process, and put a heavy focus on keeping the texture and material files organized and easy to use.

And finally it was finished!
How did it perform?
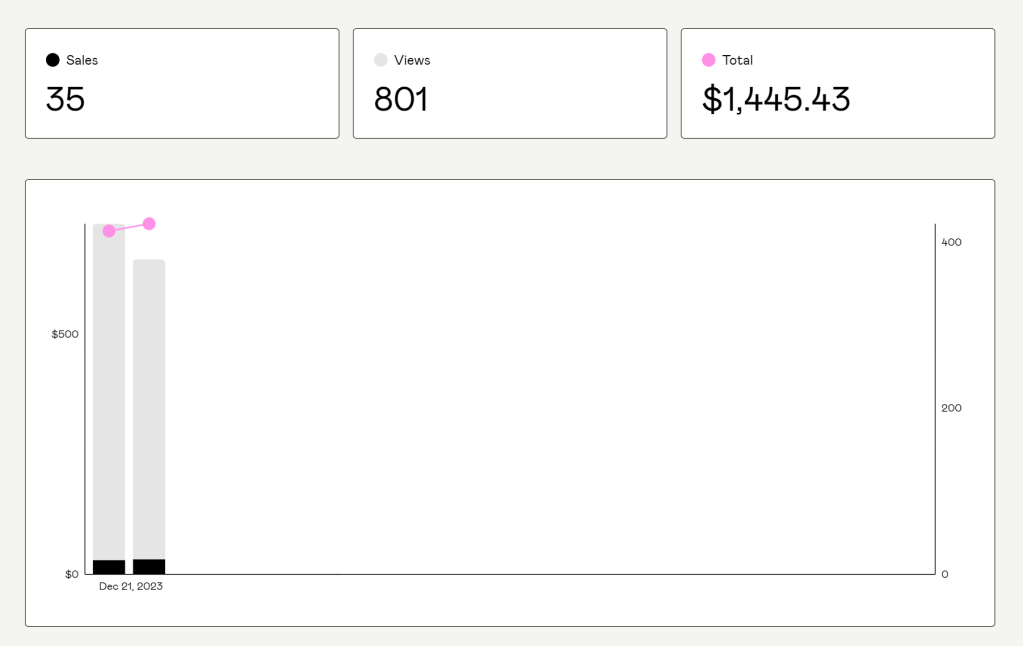
Within the first 24 hours of the avatar base launching on Gumroad, I had made a total of 35 sales, and gained a lot of traction towards my discord server and Gumroad store page. This first day hype was partly due to the constant updates I had provided across multiple discord servers, and also due to lots of the promotions I had worked on. I like to promote my work on social media and instagram, and also a website called VRCarena, as this a huge database for avatar bases and accessories, especially for the furry community.

I can tell that the promotions through the discord servers, and through social media were the most effective if we look at my referral section in Gumroad.
As of 16/01/2024, these are the statistics for the Floofvali:
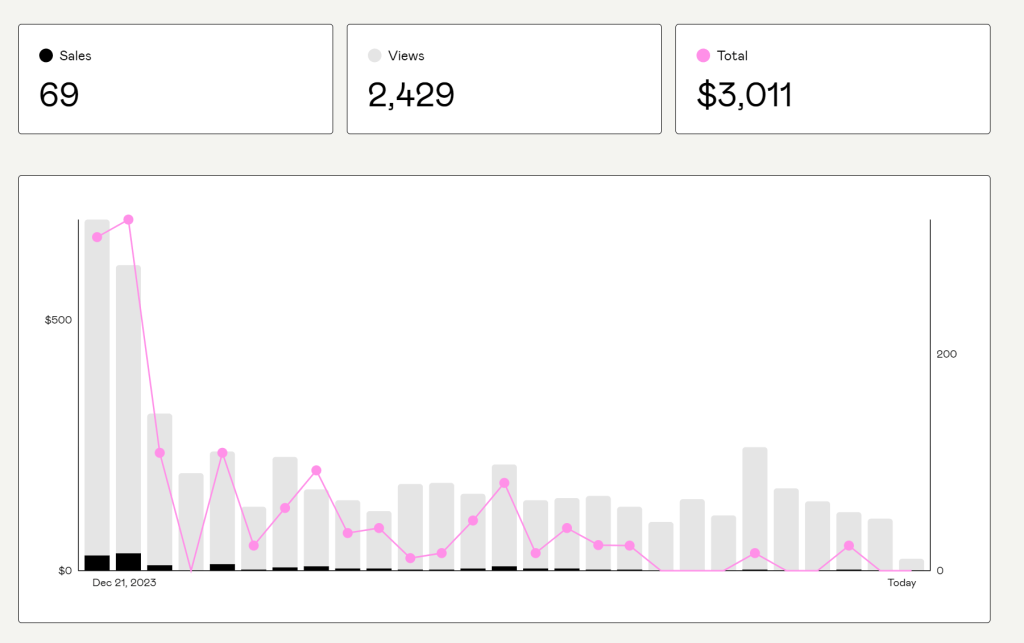
Although the sales are slowing down from the release day, this is expected, and has still been received unfathomably well for an asset that has been released for such a small time. despite only being out for a short time compared to my other assets, the Floofvali became my best selling and most profitable asset on the second day of its release.
Community feedback and response
Due to the fact I have worked hard on maintaining an active discord community, I thought it would be a great place to allow verified customers of the floofvali to gain access to exclusive chat, support, photo sharing and exclusive information channels on my server. This allowed me to receive bug reports as soon as people were buying the base. This allowed me to push out updates as soon as possible.
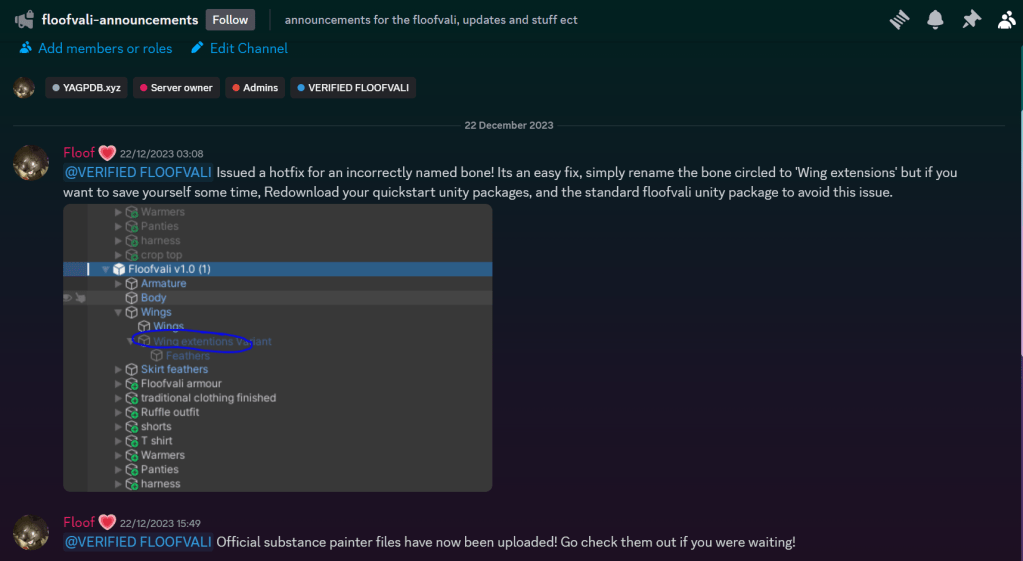
This has proven to be an amazing place to keep my customers and community updated with new features and fixes. Its friendly atmosphere also helps customers report problems without feeling anxious with getting in contact with people.
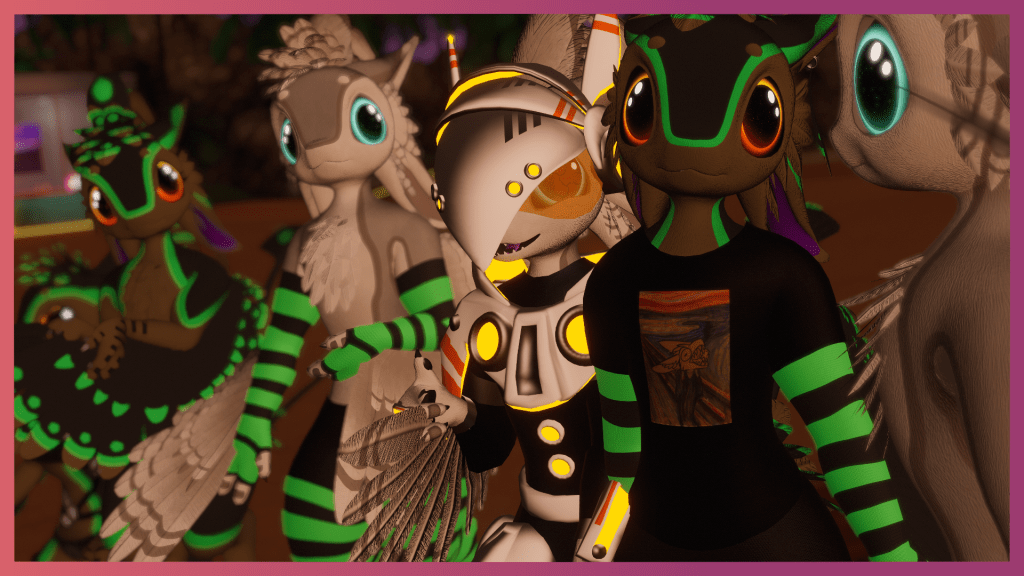
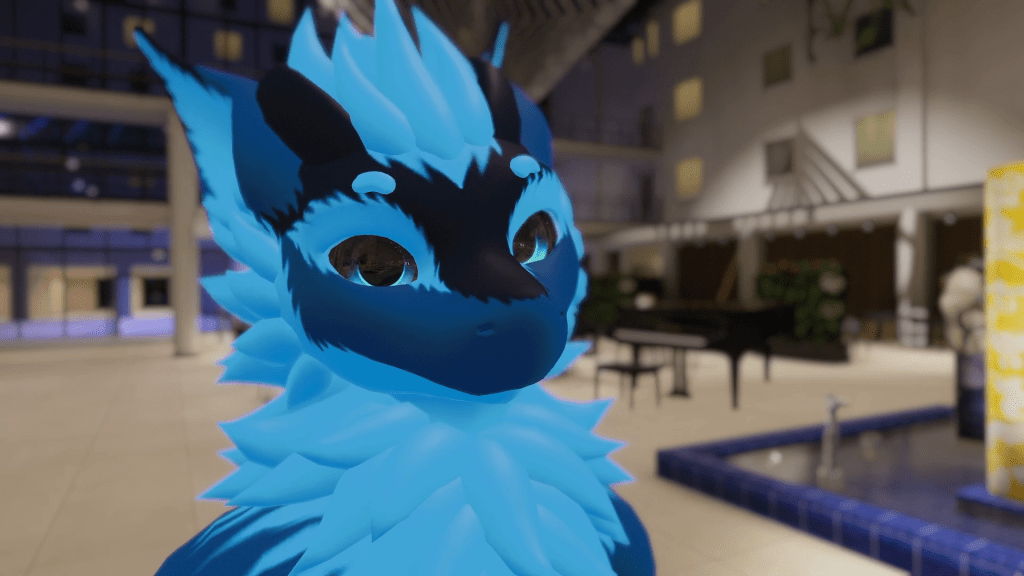
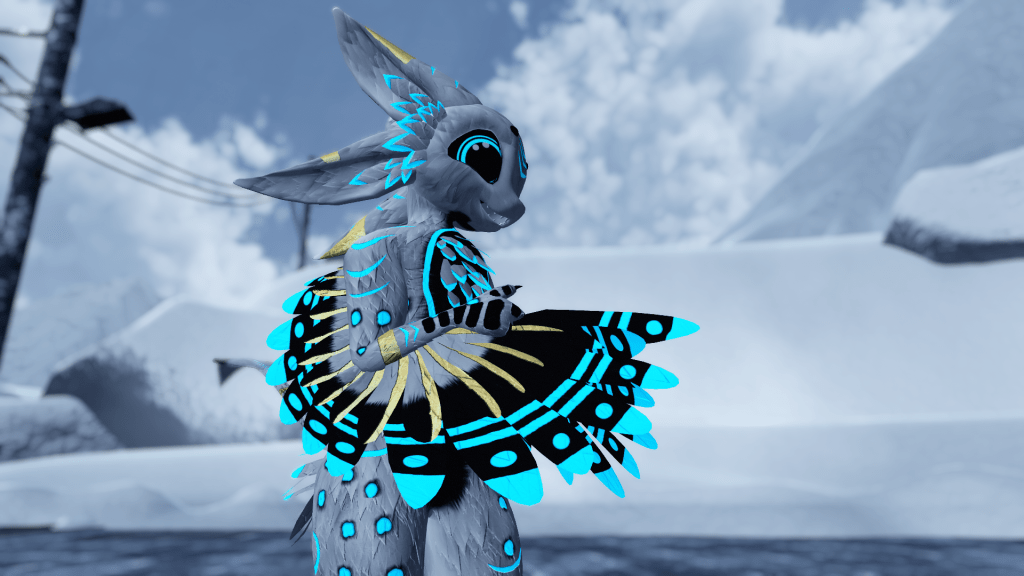
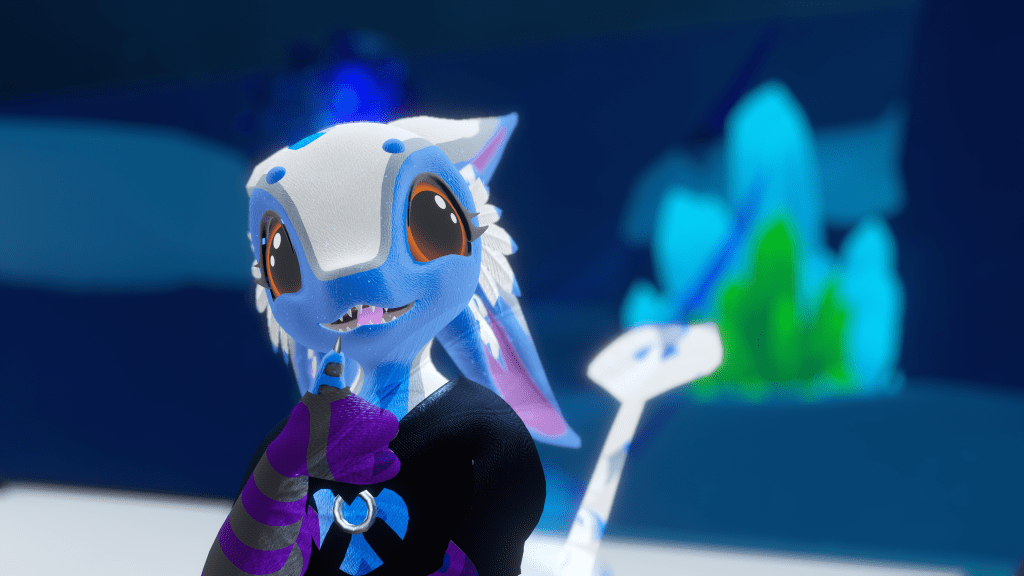
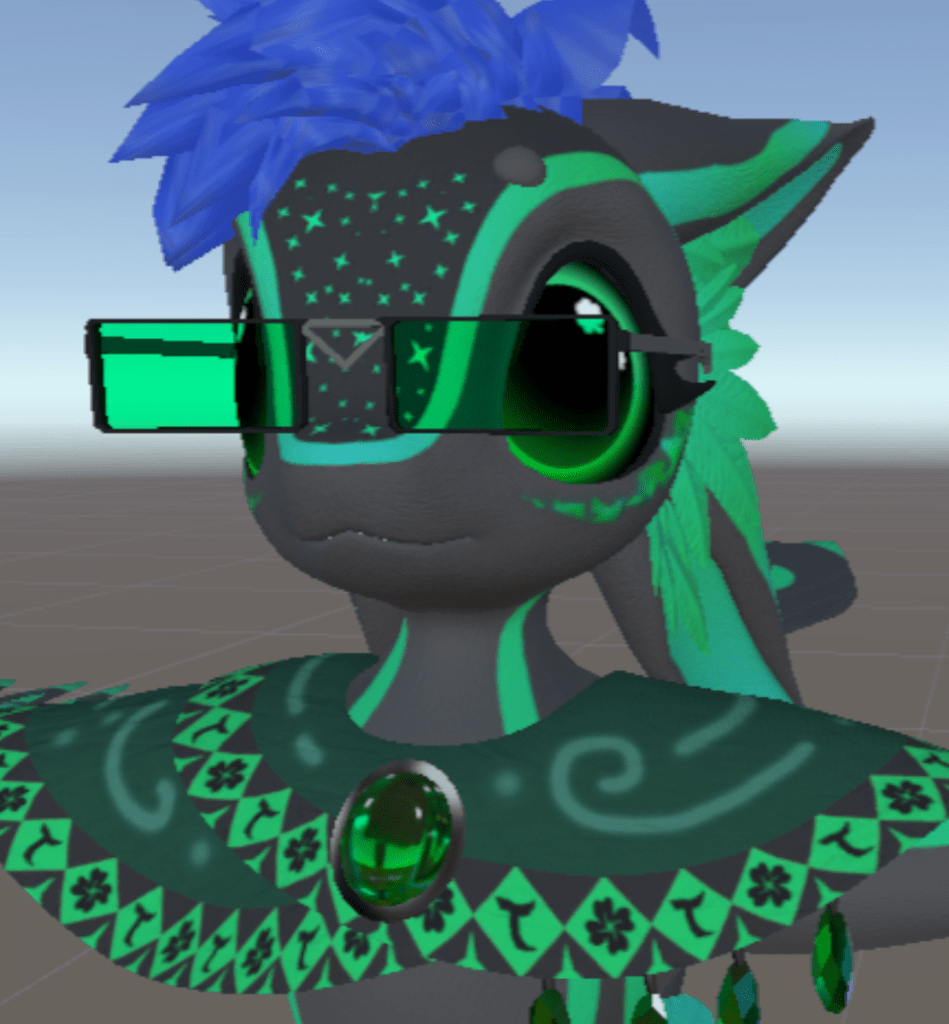
Here are a few of my favorite pictures that my customers have shared within the creation showoff channels in my server!
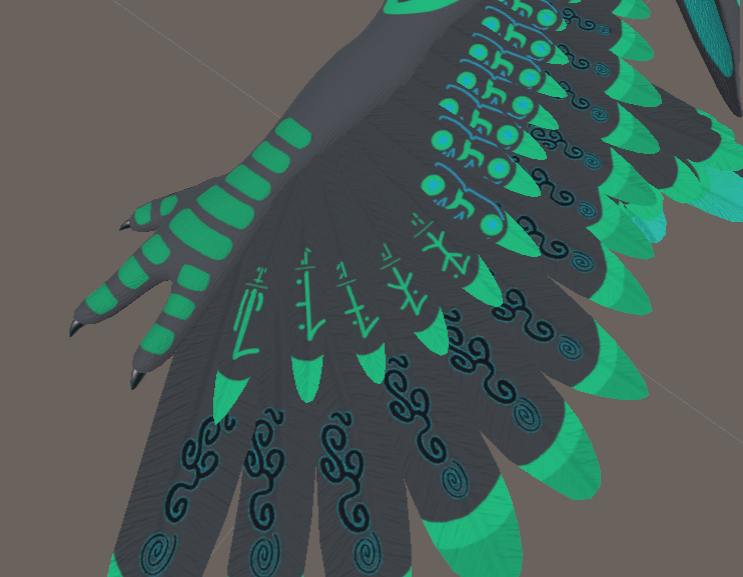
@floriangrille on discord
@phantomkeep on discord
Thank you so much for showing your interest in my product! This was a great learning experience to get to know my audience better, and I learnt so much stuff about asset and model creation. Defiantly will be making more bases in the future.

Leave a comment